| Fun with the PQ-Torus Knot |
| what is a pq-torus knot? | ||||
|
|
|
|
|
|
|
|
|
|
|
|
|
|
|
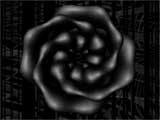
| ... and with a little tweaking ... | ||||
|
|
|
|
|
Cool huh? It's some fairly simple geometry, but it can come out looking pretty good, especially when you animate it. Now onto the math!
 |
You know how to define a circle right?
 |
 |
|
Now let's mix it up a bit by oscillating along y.
 |
 |
 |
Change it to also oscillate radially...
 |
 |
 |
Now make it loop around three times
 |
 |
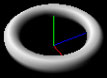
Congratulations killer, you just made a (3,8)-torus knot. As I'm sure you could guess, to generalize it just replace the 3 and 8 in the formulas above with P and Q:
Okay, so now we have this crazy curve but what we really want is some nice 3D geometry that we can light and crinkle and do all sorts of great things with. Luckily that's not too hard either. All we have to do is extrude some shape along the curve. You can do this by walking along the curve and at each step copying the shape to your current position.
Ack! Actually I lied. You also have to rotate the shape so that it stays in the plane perpendicular to the curve. The Frenet frame is good for this. It's given by:

T, N, and B form an orthonormal basis, kinda like new x,y,z axes, at each step along the curve. We can use these to orient our shape, but if you use the formulas above to find T, N, and B you are going to get more sin's and cos's than you can shake a stick at. That really sucks, so we're just going to approximate it.
We can approximate T by finding a point a little farther ahead on the curve and subtracting our current position from it.
 |
Since our curve is
centered about the origin, we can approximate N with the bit of trickery shown
in this picture.
Here P is our current position on the curve and P' is a little
farther ahead. The green line between P and P' is T. To get N
we first add P and P' giving us a vector not perpendicular to T,
but at least in the same plane. We then take the cross product
of T and N to get B (it points out of the page) and take the
cross product of B and T to get a better N (N' in the picture).

|
N and B need to be normalized before use, but we don't have to worry about T since we won't be using it. Assuming you defined your shape in the x-y plane here's how to orient it with the Frenet frame we just made:

Now we just use that on each point to orient our circles around the curve and our extrusion is complete.
The next step is to take more steps along the curve and connect the points up with some triangles.

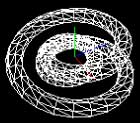

To generate the normals I just go through the mesh after it's built and for each vertex add in the normals of the faces it's part of. For this to work you have to make sure you share vertices across triangles, in other words you shouldn't have 2 vertices with the same coordinates. (Or if you do make sure to go back through and fix the vertex normals on the boundaries)
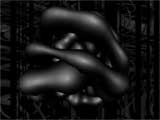
Well, that's about it. To make the cooler images shown at the top of the page, just extrude different shapes along the curve and change the shape's scale as you progress... and for some real fun environment map it. Mmmmmmmm
Anyhow, here's a fun app for you to download and run. What you see is a (7,4)-torus knot that has a couple of the radius and shape parameters animated. Enjoy: pqtorus.zip